[Java] 2020.11.25. day_24 이벤트처리(is a, has a 관계) ActionListener, WindowListener
2020. 11. 25. 18:40ㆍWeb_Back-end/Java SE

◎ Event Handling
- Window Application에서 사용자의 동작에 따른 준비된 코드를 만들어 실행시키는 것
- java.awt.event 패키지, javax.swing.event 패키지에서 관련클래스를 제공
- Swing 컴포넌트는 AWT의 이벤트처리 객체를 사용한다
○ 이벤트 종류
| 이벤트 종류 | 처리 리스너 (interface) | 주적용 컴포넌트 |
| 액션이벤트 (버튼을 클릭, TextComponent에서 Enter가 눌렸을 때) |
ActionListener | Button, Text Component |
| 윈도우 이벤트 (Window Component에만 처리) |
WindowListener | Frame, Window, Dialog |
| 키보드 이벤트 (키의 입력이 가능한 Component) |
KeyListener | TextField, JTextField, JPasswordField, JTextArea |
| 아이템 이벤트 (Item을 가지는 Component) |
ItemListener | java.awt.List, Choice |
| 리스트 선택이벤트 (Swing Component의 이벤트) |
javax.swing.event.ListSelectionListener | JList, JComboBox |
| 마우스이벤트 (모든 Component) |
MouseListener | 모든 컴포넌트에 적용가능 |
▶ ActionListener ◀
○ 이벤트 처리 방법
| 이벤트 처리방법 | 처리과정 |
| 예) 버튼을 클릭했을 때 이벤트를 처리할 것이다 | |
| 1 이벤트를 처리할 XxxListener를 구현 | public class Test extends JFrame implements ActionListener{ |
| 2 추상 method를 Override | @Override public void actionPerformed( ActionEvent ae ){ |
| 3 이벤트가 발생했을 때 제공할 기능 구현 | 이벤트가 발생했을 때 제공할 기능 구현 |
| 4 컴포넌트를 이벤트에 등록 이벤트에 등록하는 method : addXxxListener( XxxListener ); //interface를 매개변수 |
Button btn = new Button("버튼"); btn.addActionListener(this); //this : 이벤트를 처리할 객체 } } public void addActionListener (ActionListener ae){ //이벤트처리 객체생성 ActionEvent ae = new ActionEvent(); al.actionPerformed(ActionEvent ae); }//btn.addActionListener가 포함하는 내용 |
◎ is a 관계의 이벤트 처리
| is a 관계로 이벤트 처리할 때의 프로그래밍 순서 | |
| 1. 윈도우 컴포넌트를 상속, 이벤트처리 리스너를 구현 | public class Test extends JFrame implements ActionListener{ |
| 2. 이벤트처리와 관계있는 Component를 instance variable선언 | private Button btn; |
| 3. 생성자를 만들고 Compenet를 생성 | public Test(){ btn = new JButton("버튼"); |
| 4. (생성자안) 컴포넌트를 이벤트레 등록 | btn.addActionListener( this ); } |
| 5. 추상 method Override하고, 이벤트가 발생했을 때 제공할 코드 정의 |
public void actionPerformed(ActionEvent ae){ //이벤트 발생시 제공할 코드 } } |
| Dialog | |
| JOptionPane |
간단한 대화창을 제공할 때 사용하는 클래스 |
| ComfirmDialog, MessageDialog, InputDialog 가 제공 | |
| 사용법 | 객체를 생성하여 사용하지 않는다 |
| ConfirmDialog |
사용자의 의향을 물어볼 때 사용 : 예, 아니오 int flag = JOptionPane.showConfirmDialog(윈도우Component, "message"); 예) int flag = JOptionPane.showConfirmDialog(this, "창을 닫으시겠습니까?"); 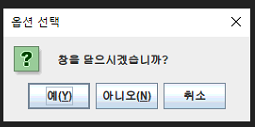 |
| //JOptionPane의 상수를 사용하여 설정 switch(flag){ case JOptionPane.OK_OPTION : dispose(); //종료처리 break; case JOptionPane.NO_OPTION: System.out.println("아니오"); break; case JOptionPane.CANCEL_OPTION: System.out.println("취소"); } |
|
| MessageDialog | 사용자에게 단순 정보를 제공할 때 사용 JOptionPane.showMessageDialog(윈도우컴포넌트, "message"); 예) JOptionPane.showMessageDialog(this, "오늘은 수요일"); 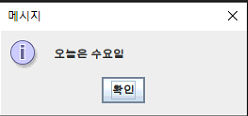 |
| InputDialog | 사용자가 입력하는 메세지를 받을 때 사용 String msg = JOptionPane.showInptuDialog("message"); 예) String msg = JOptionPane.showInputDialog("하고싶은 말 입력"); 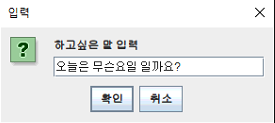 |
○ 이벤트 비교
| 이벤트 비교처리 | |
| 이벤트를 발생시킨 컴포넌트에 대한 비교처리 | |
| 위치 | 이벤트 처리 method( Override한 method안) |
| 1. 이벤트 등록 | btn.addActionListener(this); //=> actionPerformed tf.addActionListener(this); //=> actionPerformed |
| 2. 이벤트 처리 | method에서 매개변수로 입력되는 객체(XxxAction)를 사용하여 비교 public void actionPerformed(ActionEvent ae){ //매개변수로 입력되는 이벤트 객체는 이벤트를 발생한 객체의 주소를 얻을 수 있다 if(ae.getSource() == btn){ //이벤트를 발생시킨 객체의 주소가 btn과 같은지 비교 } } |
○ JPasswordField의 값얻기
| JPasswordField의 값얻기 | |
| JPasswordField의 값을 String으로 얻기 JPasswordField jpf = new JPasswordField(); char[] pass = jpf.getPassword(); |
|
| ◉ char형의 배열은 주소가 아니라 값이 출력된다(다른배열은 주소참조형이기 때문에 주소가 출력) | |
| char형의 배열 | 문자열로 저장하는 방법 |
| 1. 생성자 사용 | String str = new String(pass); |
| 2. valueOf()사용 | String str = String.valueOf(pass); |
◎ has a 관계의 이벤트 처리
| has a 관계 이벤트 처리할 때의 프로그래밍 순서 | |
| 1. 디자인클래스를 생성 | |
| 1-1. 윈도우 컴포넌트를 상속 | public class Test extends JFrame{ |
| 1-2. 이벤트 처리대상 컴포넌트를 선언 | JButton btn; |
| 1-3. 생성자 작성, 컴포넌트를 생성 | public Test(){ btn = new JButton("click"); } |
| 1-4. 이벤트처리객체를 생성하고, 이벤트 등록 | TestEvent te = new TestEvent(this); btn.addActionListener(te); |
| 1-5. 이벤트처리클래스에서 디자인클래스의 컴포넌트를 사용하기 위해 getter method작성 |
public JButton getBtn(){ retrun btn; } |
| 1. 이벤트 클래스 생성 | |
| 1-1. 이벤트 인터페이스를 구현 | public class TestEvent implements ActionListener{ |
| 1-2. 디자인 클래스를 인스턴스변수로 선언 | private Test t; |
| 1-3. 생성자에서 디자인 클래스의 객체를 전달 | public TestEvent(Test t){ this.t = t; } |
| 1-4. 추상 method Override | public void actionPerformed(ActionEvent ae){ //이벤트가 발생했을 때 처리할 코드 } |
○ Non Visual Component 사용
| Non Visual Component 사용 | |
| Font 클래스의 사용 | |
| - | java.awt 패키지에서 제공 |
| Non Visual Component로 컴포넌트의 폰트(글꼴, 크기, 스타일) 정보를 변경해주는 일을 하는 클래스 |
|
| 사용법) | |
| 1. 객체생성 | Font fnt = new Font("글꼴", 스타일, 크기); 글꼴 : Dialog, DialogInput, Monospaced, Serif, or SansSerif 스타일 : PLAIN, BOLD, ITALIC(for example, bitwise BOLD | ITALIC) Font fnt = new Font("SansSerif", Font.BOLD, 20); |
| 2. setFont()를 사용 | font를 적용할 컴포넌트에 setFont()를 사용하여 생성된 font를 적용. JButton jbtn=new JButton(); jbt.setFont( f ); |
| Color 클래스 | |
| - | Non Visual Component로 컴포넌트의 글자색, 바닥색을 변경할 때 사용 |
| 몇가지 색은 Constant로 제공, 복잡한 색은 RGB color로 설정할 수 있다 | |
| 글자색 | 글자색(전경색) : Foreground Color 예) jlbl.setForeground( Color.RED ); |
| 바닥색 (배경색) |
바닥색 : Background Color 예) jlbl.setBackground( Color.BLACK ); ▷투명도를 해제하지 않으면 색이 안보이는 경우 바닥색 투명도를 해제 : setOpaque(true); |
▶ WindowListener ◀
| XxxxAdapter : 추상 method를 하나 이상 가지고 있는 이벤트 처리용 interface를 미리 구현해놓은 추상클래스 |
|
| WindowListener를 구현하여 이벤트를 처리하면 WindowClosing method하나만 사용하게 된다 나머지 6개의 method는 사용하지 않아도 반드시 구현해야한다 |
|
| WindowListener를 미리 구현한 WindowAdapter를 사용하면 필요한 method하나만 구현하면 된다 |
|
| WindowListener => WindowAdapter KeyListener => KeyAdapter MouseListener => MouseAdapter |